
Stock Management for Variable Products
When your products come in different sizes, colors, or other variations, managing stock can get a bit more complicated. Unlike standard products with a single inventory count, variable products track stock for each variation individually. In this guide, we’ll walk through how to set up a variable product and manage stock for each option, step by step.
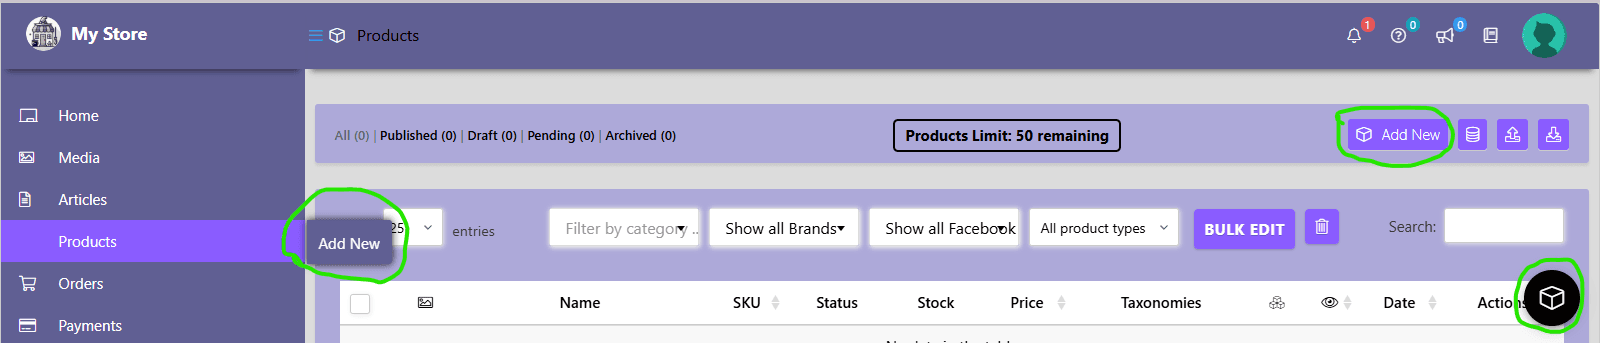
🏠 Step 1: Add a New Product
To begin, head to your Store Manager. There are a few ways to add a product:
Hover over Products in the left-hand menu to reveal a quick Add New link.
Click Products to open the full product list, where you’ll also find an Add New button at the top.
There’s also a floating cube icon in the lower corner of the screen, which opens a different quick-add popup (not shown in this guide).
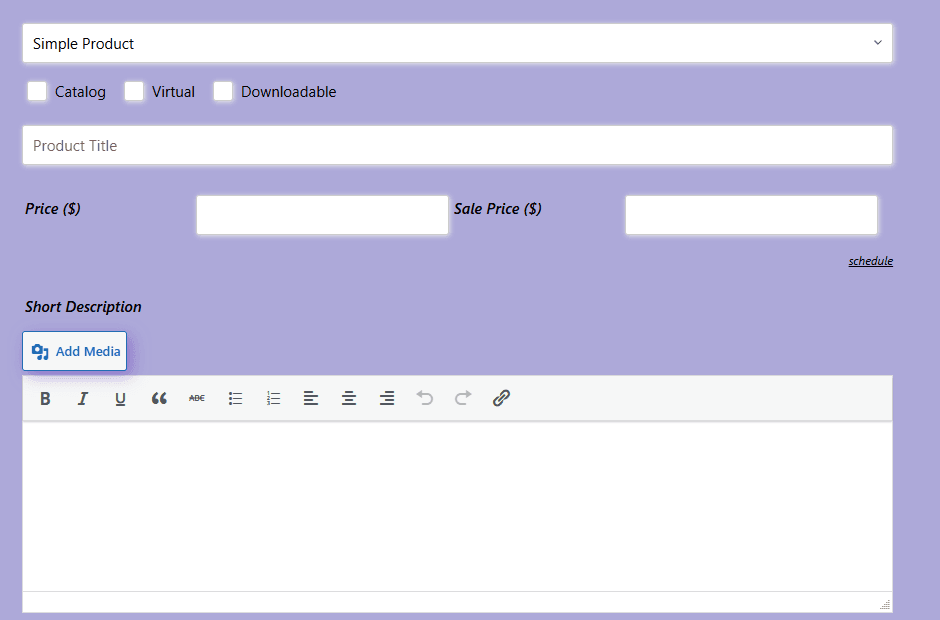
Once the product form opens, you can:
Enter the product name
Add a full description and short description
Upload a product image and gallery
Set your categories and tags
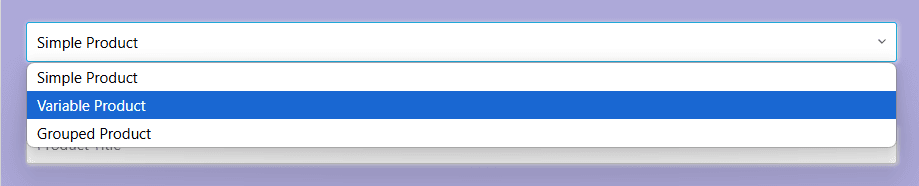
🔄 Step 2: Set the Product Type to Variable
At the very top of the form, you’ll see a drop-down to change the product type. Switch it from Simple Product to Variable Product. This unlocks additional options for adding attributes and defining variations.
🧹 Step 3: Add Product Attributes
Scroll down to the bottom of the form to find the Attributes tab. Attributes are used to define the options that will later become variations—such as Size, Color, Material, etc.
Click the Add button.
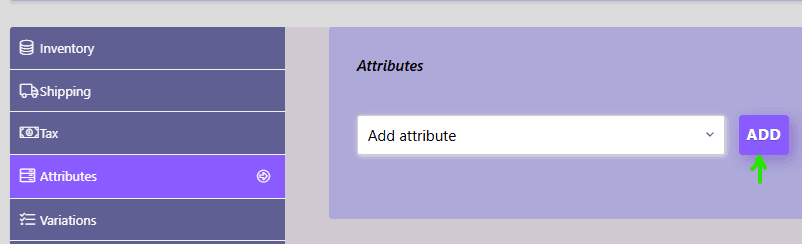
Name your attribute (e.g., “Color”)
Define the values using a vertical bar | to separate them (e.g., Red | Green | Blue)

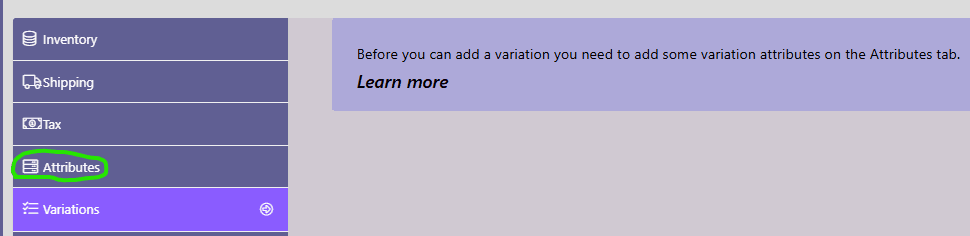
🧬 Step 4: Define Variations
Next, click on the Variations section (just below Attributes) and wait a moment for the form to load.
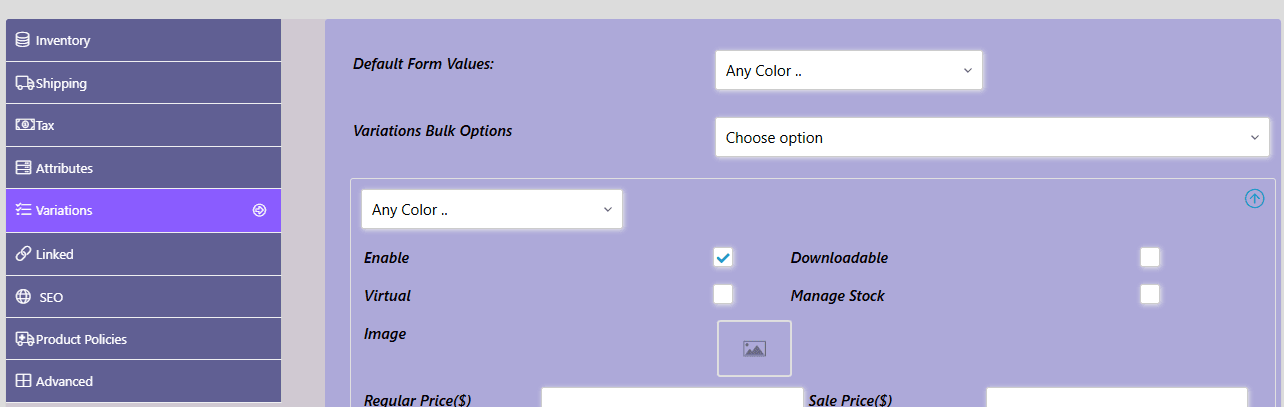
The Default Form Values allows you to select which variation will be the default variation. The Variations Bulk Options allows you to quickly apply an option (action) to all variations simultaneously. 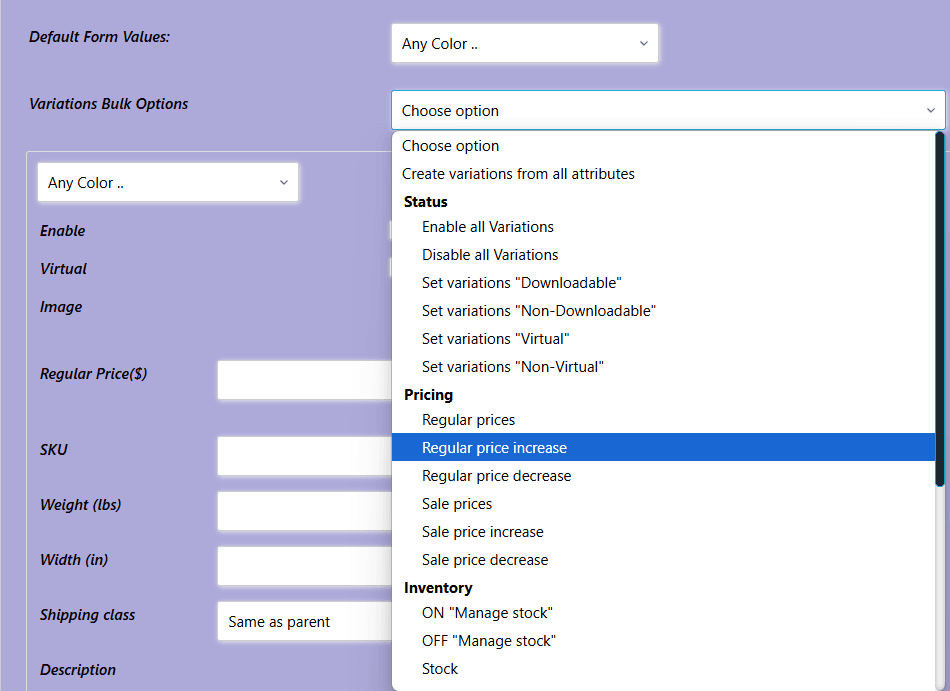
The next box contains all the settings for your first variation. Use the drop-down to choose which variation you want to set up. In the example below, I chose the Red value for the Color attribute. To set the Stock Qty for that variation, you must first enable the Manage Stock toggle.
You would also set up all the other details for that product variation including price, description, etc.
The arrow in the top-right corner collapses the box hiding all the extra details. The + in the bottom-right corner allows you to add the next variation.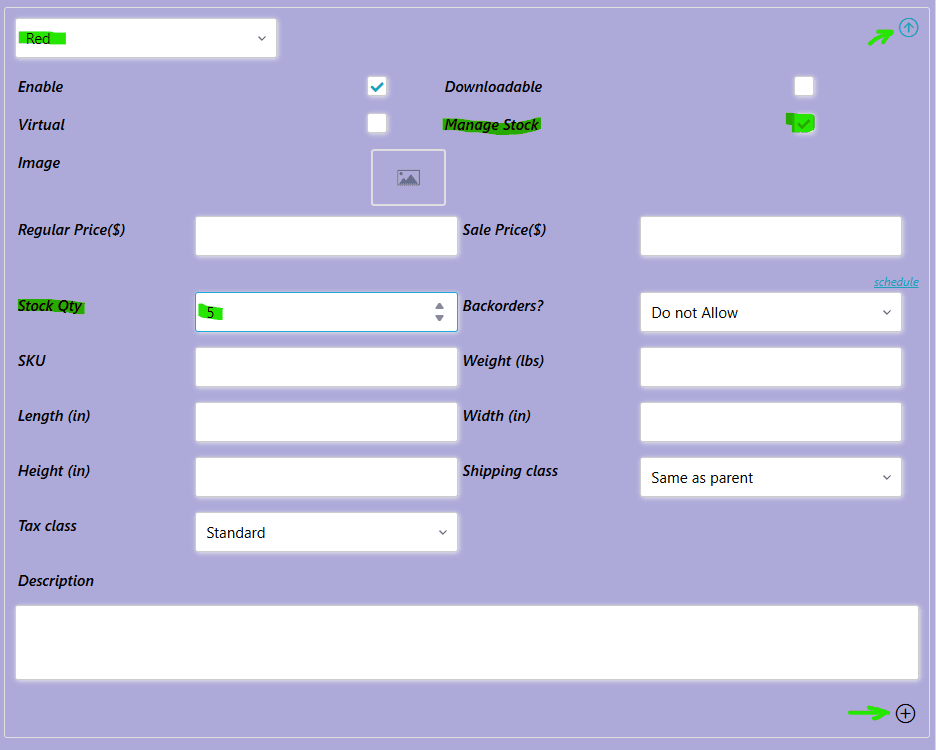
In the following image, I have set up all 3 variations Stock Qty, but the Red and Green variations have been collapsed to hide the details.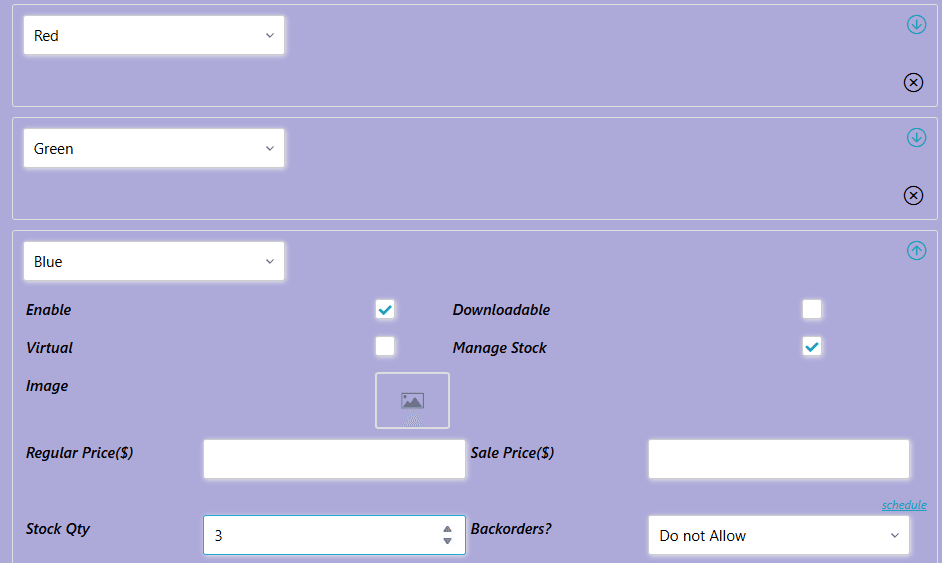
Ensure that the Inventory settings does not manage stock as seen in the next image. Also make sure each variation has a price set, otherwise it will also be “out of stock”.
Now, once published, you should have a variable product like this: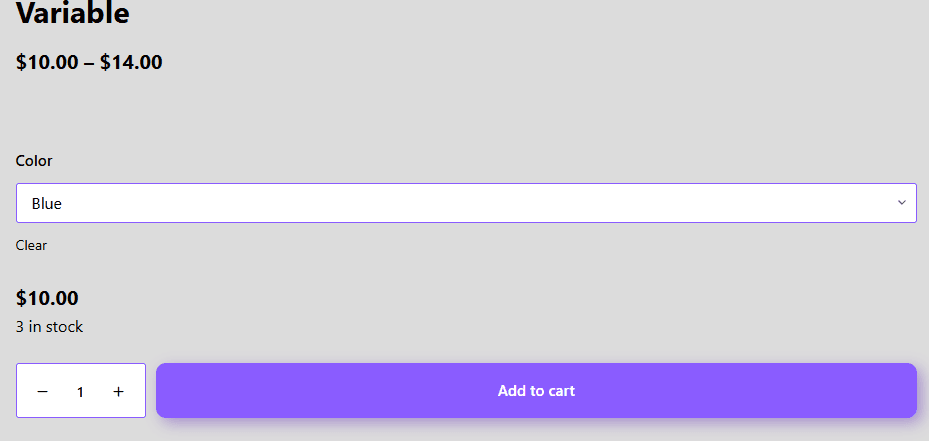
If your product has multiple attribute’s everything is pretty much the same, just add the additional attribute(s) and associated values. Then when you go to build your variations you’ll combine attributes like this: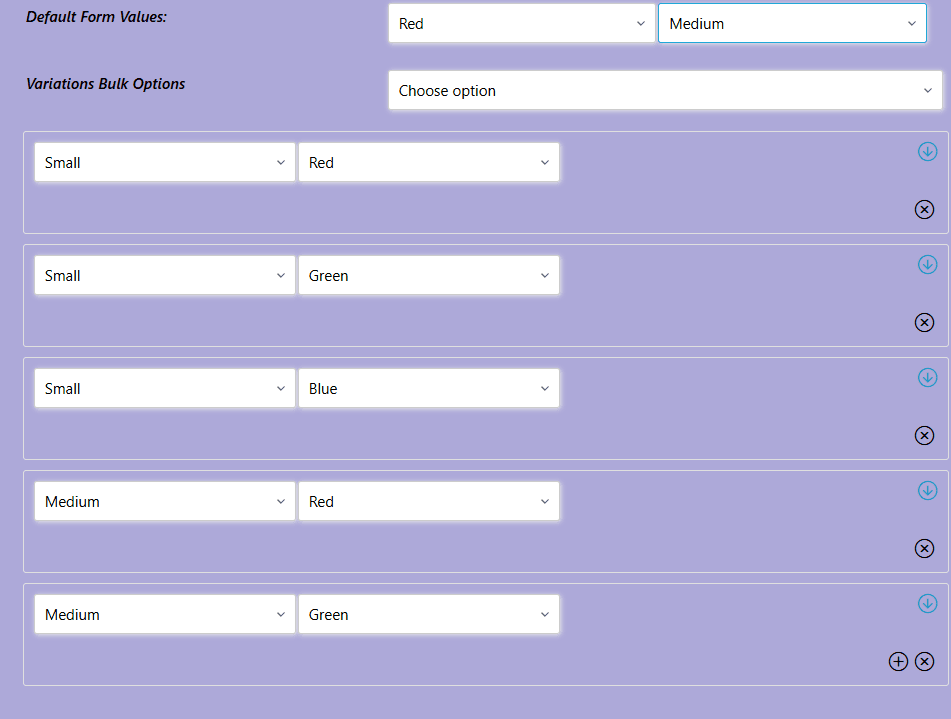
I hope this guide is helpful! As always, feel free to ask questions in the comments, contact me directly, or post in the forum.
—Crafty Covens
